前言
当我们使用Vue去开发项目时,Vue-Cli 给我们提供了一套开箱即用的项目模版,免去了我们配置 webpack 的烦恼。但由于Vue-Cli是面向所有开发者的,它所提供的项目模版是非常基础的,当我们使用这套模版去开发的时候,通常还要再引入 axios Element-ui 等常用的三方库,以及配置一些常用的 webpack 优化配置;但是当我们再次新开项目时,这些常用的东西又需要再去复制过来,作为一名前端人,这种重复性劳动,实在是难以接受,所以我们就希望可以自己定义自己的项目模版,我们开新项目时,直接使用自己的模版,常用的内容我们都是配置好的。
然后 iframe架构微前端实战 中也提到了将父子项目做成常用的项目模版,方便新项目开发,所以本篇就来聊下怎么自定义Vue-Cli项目模版
项目地址: https://github.com/luokaibin/iframe-child-template
3个文件一个模版
自定义一个Vue-Cli的项目模版,真的简单到不能再简单,也就主要需要提供3个文件 preset.json prompts.js generator.js 和一个模版 template 把你的模版放到 template 文件夹下。
为了在任何设备上都可以使用你的模版,建议把你的模版放在 github 上,所以 第一步去gitHub上建一个项目,然后把你的项目拉下来,拉下来之后在项目中去吧上面的三个文件和一个文件夹创建好,此时目录结构如下
1
2
3
4
| ├── template
├── generator.js
├── preset.json
└── prompts.js
|
这三个文件起什么作用
preset.json
当你使用 vue create 命令去创建项目时,最后会提示你保存你的选项信息,当你下次创建项目时,可以直接选择你上次已经选择过的信息,不用再次选了。preset.json 中就是要这些预先设置好的信息,简称预设;官方文档 preset
prompts.js
当你使用 vue create 命令去创建项目时,会提问你是否使用 Bable 等,prompts.js 就是用来存放你的问题与提供的选项的;prompts.js 最终需要导出一个数组,这个数组必须是满足Inquirer 问题格式的数组,Inquirer官方文档
generator.js
generator.js 导出一个函数,这个函数接收三个参数
- 一个
GeneratorAPI 实例:自定义模版必然用到 GeneratorAPI 的 render() 方法
- 这个插件的 generator 选项,也就是用户对
prompts.js 中问题所提供的答案
- 整个 preset (
presets.foo) 将会作为第三个参数传入。
generator.js 官方文档
实现一个简单版的自定义模版
第一步
先用 vue create 去创建一个项目,然后把你的预设信息保存下来,到 ~/.vuerc 中,把你刚保存的预设信息复制到 preset.json
打开 .vuerc 你看到的可能是这个样子的数据
1
2
3
4
5
6
7
8
9
10
11
12
13
14
15
16
17
18
19
20
21
22
23
24
25
26
| {
"useTaobaoRegistry": true,
"latestVersion": "4.2.3",
"lastChecked": 1584603622605,
"packageManager": "npm",
"presets": {
"test": {
"useConfigFiles": true,
"plugins": {
"@vue/cli-plugin-babel": {},
"@vue/cli-plugin-router": {
"historyMode": true
},
"@vue/cli-plugin-vuex": {},
"@vue/cli-plugin-eslint": {
"config": "prettier",
"lintOn": [
"save",
"commit"
]
}
},
"cssPreprocessor": "less"
}
}
}
|
presets 保存的就是你的预设信息,test 是你保存预设起的别名,preset.json 需要的就是 test 的值,所以preset.json 中的内容就是这样
1
2
3
4
5
6
7
8
9
10
11
12
13
14
15
16
17
18
| {
"useConfigFiles": true,
"plugins": {
"@vue/cli-plugin-babel": {},
"@vue/cli-plugin-router": {
"historyMode": true
},
"@vue/cli-plugin-vuex": {},
"@vue/cli-plugin-eslint": {
"config": "prettier",
"lintOn": [
"save",
"commit"
]
}
},
"cssPreprocessor": "less"
}
|
第二步
prompts.js 我们可以不提供问题,导出一个空数组就行;generator.js 中调用 extendPackage 方法,给 package.json 添加命令和开发与生产环境的包;再调用 render 方法去复制template中的模版
1
2
3
4
5
6
7
8
9
10
11
12
13
14
15
16
17
18
19
20
21
22
23
24
25
26
27
28
29
30
31
32
33
34
35
36
37
38
|
module.exports = (api, options, rootOptions) => {
api.extendPackage({
scripts: {
"serve": "vue-cli-service serve",
"build": "vue-cli-service build",
"lint": "vue-cli-service lint"
},
dependencies: {
"core-js": "^3.6.4",
"terser-webpack-plugin": "^2.3.5",
"vue": "^2.6.11",
"vue-router": "^3.1.5",
"vuex": "^3.1.2"
},
devDependencies: {
"@vue/cli-plugin-babel": "~4.2.0",
"@vue/cli-plugin-eslint": "~4.2.0",
"@vue/cli-plugin-router": "~4.2.0",
"@vue/cli-plugin-vuex": "~4.2.0",
"@vue/cli-service": "~4.2.0",
"@vue/eslint-config-prettier": "^6.0.0",
"babel-eslint": "^10.0.3",
"eslint": "^6.7.2",
"eslint-plugin-prettier": "^3.1.1",
"eslint-plugin-vue": "^6.1.2",
"less": "^3.0.4",
"less-loader": "^5.0.0",
"lint-staged": "^9.5.0",
"prettier": "^1.19.1",
"vue-template-compiler": "^2.6.11"
}
});
api.render('../template');
};
|
第三步
把你的项目模版复制到 template 中,然后删除 package.json 文件,对于以 . 开头的文件,改成 _ ,例如 .eslintrc.js ==》_eslintrc.js , 最后把你的项目上传到gitHub就行了
第四步
使用 vue create --preset username/repo my-project 去创建你的项目,username/repo 是你的github用户名和仓库名

完成
到这里一个简单的Vue-Cli项目模版就制作完成了,这里提供个我给 iframe架构微前端实战 做的子模版,子模版地址:https://github.com/luokaibin/iframe-child-template
使用命令:vue create --preset luokaibin/iframe-child-template your-project-name
注意事项
模版中以 . 开头的文件需要将 . 改为 _ 否则用模版创建项目时,. 开头文件复制不进去;官方说明
当你使用模版去创建项目时,如果出现报错,并且确认不是自己的代码问题,可把 .vuerc 中的 presets 删除掉。
如果项目中多了些Vue-Cli默认模版的文件,可以使用下方方法先删除默认模版,再去复制自定义模版
1
2
3
4
5
6
7
8
9
10
11
12
|
module.exports = (api, options, rootOptions) => {
api.render(files => {
Object.keys(files)
.filter(path => path.startsWith('src/') || path.startsWith('public/'))
.forEach(path => delete files[path])
console.log(Object.keys(files))
})
api.render('../template');
};
|
扩展知识
Inquirer
如果使用模版创建项目时,你想向用户提供一些问题,比如让用户选择是使用 iView 还是 element-ui ,那么你就必须提供 prompts.js 这个信息,它的内容是一个符合 Inquirer 数据结构的数组,所以你需要了解下 ·Inquirer官方文档
这里提供个示例
1
2
3
4
5
6
7
8
9
10
11
12
13
14
15
16
17
18
19
20
21
22
| module.exports = [
{
name: 'ui',
type: 'list',
message: '请选择UI库',
choices: [
{
name: 'Element UI',
value: 'element-ui'
},
{
name: 'iView',
value: 'iview'
},
{
name: 'none',
value: 'none'
}
],
default: 'none'
}
]
|
ejs
你肯定也希望根据用户选择的 UI库 不同,所引入使用的的组件不同,根据不同内容,渲染不同的模版,那么你就需要用到 ejs,官方文档 ,这里给个 ejs 示例,在 template 模版内
1
2
3
4
5
6
7
8
9
10
11
12
13
14
15
16
17
18
19
20
21
22
23
24
25
26
27
28
29
30
31
32
33
34
35
36
37
38
39
40
41
42
43
44
45
46
47
48
49
50
51
52
53
54
55
56
57
58
59
60
61
62
63
64
65
66
67
68
69
70
| <template>
<%_ if (options.ui === 'element-ui') { _%>
<el-container>
<el-header>Header</el-header>
<el-container>
<el-aside width="200px">Aside</el-aside>
<el-container>
<el-main>Main</el-main>
<el-footer>Footer</el-footer>
</el-container>
</el-container>
</el-container>
<%_ } _%>
<%_ if (options.ui === 'iview') { _%>
<Layout class="home">
<Header>Header</Header>
<Layout class="content">
<Sider hide-trigger>Sider</Sider>
<Layout>
<Content>Content</Content>
<Footer>Footer</Footer>
</Layout>
</Layout>
</Layout>
<%_ } _%>
<%_ if (options.ui === 'none') { _%>
<h1>首页</h1>
<%_ } _%>
</template>
<script>
export default {
name: 'Home',
};
</script>
<style lang="stylus" scoped>
<%_ if (options.ui === 'element-ui') { _%>
.el-container:first-child
height 100vh
.el-header, .el-footer
background-color #B3C0D1
color #333
text-align center
line-height 60px
.el-aside
background-color #D3DCE6
color #333
text-align center
line-height 200px
.el-main
background-color #E9EEF3
color #333
text-align center
line-height 160px
<%_ } _%>
<%_ if (options.ui === 'iview') { _%>
.home
height 100vh
color #ffffff
.content
flex-direction row
.ivu-layout-header
background-color #2d8cf0
.ivu-layout-footer
background-color #808695
color #ffffff
<%_ } _%>
</style>
|
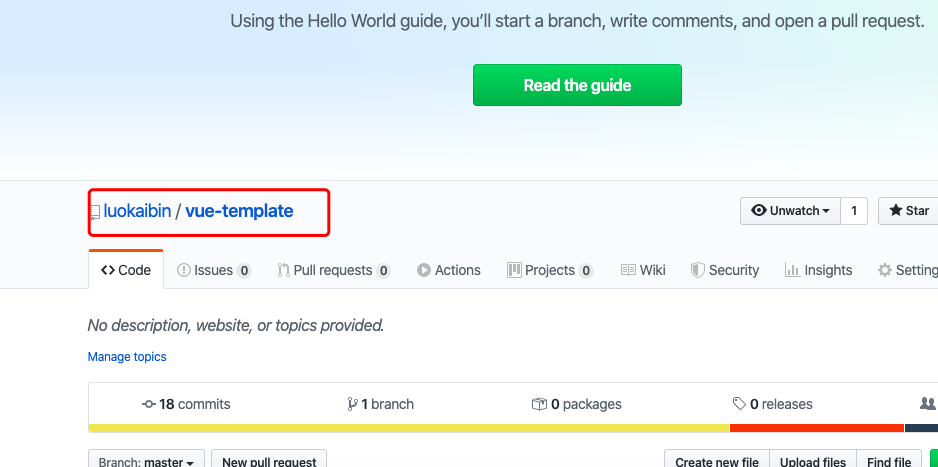
在模版中使用 ejs 可以看我这个项目,这个项目中使用了 Inquirer 和 ejs ,项目地址:https://github.com/luokaibin/vue-template
如果想要更深入学习自定义模板,一个需要看官方文档,另一个推荐一位大佬的项目,项目地址:https://github.com/cklwblove/vue-preset,项目文档比较详细,也讲了作者自定义模版过程中所踩的一些坑,我这个模版的制作,也参考了这个项目,推荐一下
